Screenshots are an essential tool for capturing and sharing information from your computer screen. Whether you’re working on a project, reporting an issue, or creating tutorials, taking screenshots is a quick and easy way to save and share what’s on your screen. In this article, we will cover the different methods of taking a screenshot on Windows 10 and Windows 11.
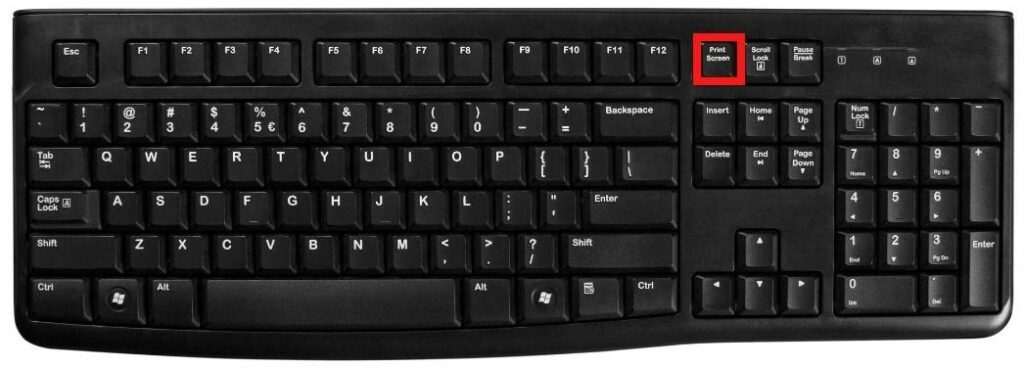
Method 1: Using the Print Screen Button

To take a screenshot using the Print Screen button, follow these steps:
- Make sure that the screen you want to capture is open and active.
- Press the “Print Screen” or “PrtScn” button on your keyboard.
- Open an image editing program, such as Paint or Photoshop.
- Press “Ctrl + V” or right-click and select paste to paste the screenshot into the image editing program.
- Save the image as desired.
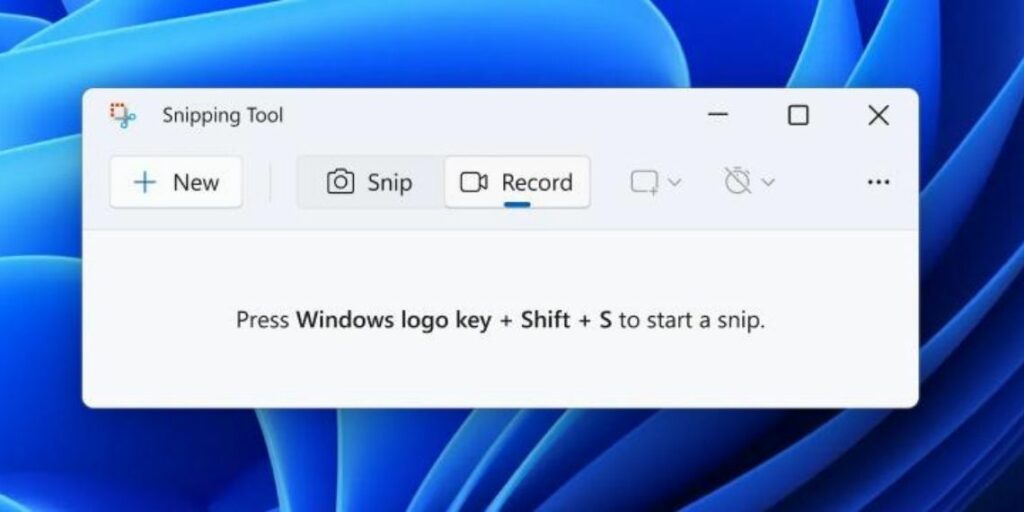
Method 2: Using the Snipping Tool

The Snipping Tool is a built-in Windows program that allows you to take screenshots of specific areas of your screen, rather than the entire screen.
To take a screenshot using the Snipping Tool, follow these steps:
- Open the Snipping Tool by searching for it in the Start menu or by pressing in the “Windows + R” keys and typing “snippingtool” in the Run box.
- Drag the cursor around the area you want to capture. Release the cursor to take the screenshot.
- Save the image as desired.
Method 3: Using the Keyboard Shortcut Key

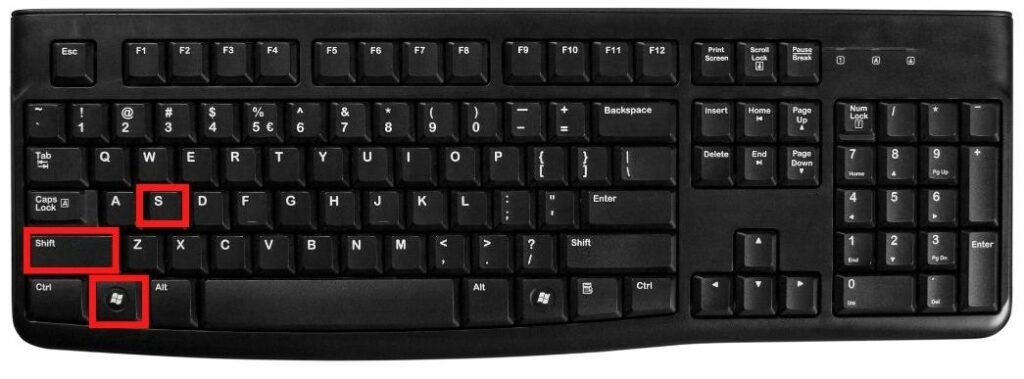
The Windows + Shift + S shortcut is a quick and easy way to take a screenshot on Windows 10 and 11. It allows you to capture a specific area of your screen and paste it directly into an image editing program.
To take a screenshot using the Windows + Shift + S shortcut, follow these steps:
- Press the “Windows + Shift + S” keys on your keyboard.
- Your screen will dim and the cursor will turn into a crosshair. Drag the cursor around the area you want to capture.
- The screenshot will be copied to your clipboard.
- Open an image editing program, such as Paint or Photoshop.
- Press “Ctrl + V” or right-click and select paste to paste the screenshot into the image editing program.
- Save the image as desired.
Method 4: Using Game Bar

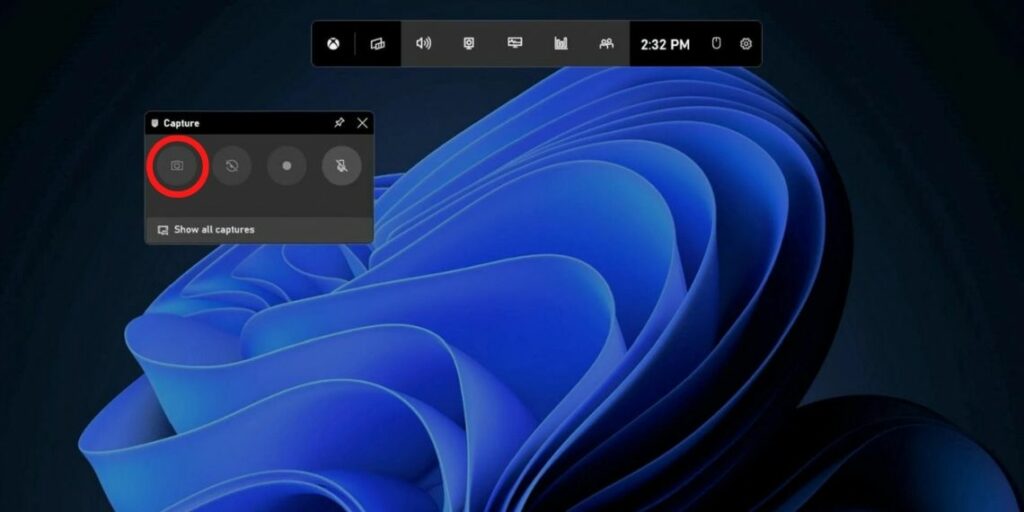
The Game Bar is a tool that was introduced in Windows 10 and 11 to help users capture screenshots and record gameplay. It can be used to take screenshots of any app, not just games.
- Press the “Windows key + G” on your keyboard.
- Now a pop-up window option will appear on your screen.
- Now click on “Camera icon” from the pop-up window option.
- Screenshot automatically save.
- To find saved screenshot go to “This PC > Pictures > Screenshots“.
Method 5: Using Third-party Software
Taking screenshots on Windows 10 and 11 can be done in a number of ways. Using third-party software is another way. Here are some steps you can follow to take a screenshot on Windows 10 or 11 using third-party software:
- There are several third-party screenshot tools available for Windows 10 and 11, such as Lightshot, Snagit, ShareX, Greenshot, and PicPick, to name a few. Choose the one that you prefer and download it to your computer.
- Once the software is downloaded, run the installer to install the tool on your computer.
- Once the software is installed, launch it from the Start menu or from the desktop shortcut, if you have created one.
- Most third-party screenshot tools offer different screenshot modes, such as full screen, active window, selected area, scrolling window, and more. Choose the screenshot mode that best fits your needs.
- Once you have chosen the screenshot mode, the software will automatically capture the screenshot. You can also add annotations, highlights, or other effects to the screenshot before saving it.
- Finally, save the screenshot by clicking on the “Save” button or by selecting “File” and then “Save” from the menu. Choose a location on your computer where you want to save the screenshot and give it a name.
These are the basic steps you can follow to take a screenshot on Windows 10 or 11 using third-party software. The exact steps may vary slightly depending on the software you are using.
How to Take Screenshot on Microsoft Surface Book
Taking a screenshot on a Microsoft Surface Book can done in a few simple steps. Here’s a step-by-step guide on how to do it:
- Open the window or application that you want to capture in the screenshot. Make sure it’s in the right size and position that you want to capture.
- Press and hold the “Power + Volume up” button at the same time. You’ll hear a sound indicating that the screenshot has been capture.
- The screenshot will saved in the “Pictures” folder, under “Screenshots.” Open File Explorer, navigate to the “Pictures” folder, and then click on the “Screenshots” folder to view the screenshot.
- If you want to share the screenshot, you can use the “Share” feature in Windows to share it on social media, email, or instant messaging platforms. If you want to save the screenshot, you can right-click on the image and select “Save As” to save it to a different location on your Surface Book.
These are the steps you can follow to take a screenshot on a Microsoft Surface Book. The process is straightforward and should take just a few seconds to complete.
FAQs
Your screenshots are usually saved in the “Pictures” folder in your “This PC” directory. Alternatively, you can search for “screenshots” in the search bar on your computer to find all of your saved screenshots.
Yes, you can take a screenshot on Windows without using keyboard shortcuts or built-in tools by using third-party screenshot software. There are many free and paid options available, such as Lightshot, Nimbus Screenshot, and Greenshot, that offer additional features and options for taking screenshots.
Yes, you can edit your screenshots after you take them on Windows. You can use image editing software such as Paint or Adobe Photoshop to make changes to your screenshots, including cropping, resizing, and adding text or other graphics.
Taking a scrolling screenshot on Windows requires the use of third-party screenshot software. You can use tools such as PicPick or Snagit to capture scrolling screenshots. These tools allow you to capture an image that is longer than your screen by automatically scrolling and stitching the screenshots together.
Conclusion
In conclusion, taking a screenshot on Windows 10 and 11 is a quick and easy process that can done using a variety of methods. Whether you prefer using the built-in Print Screen key, Snipping Tool, keyboard shortcuts, game bar or a combination of all four, there’s a solution that will work best for you.


