A screenshot is a digital image that captures the current state of your computer screen. It can be useful for a variety of reasons such as sharing information with others, troubleshooting a problem, or simply keeping a record of important information. Taking a screenshot on a MacBook is easy and there are several ways to do it. In this post, we will explore the different methods for taking a screenshot on a MacBook, including keyboard shortcuts, the built-in Screenshot tool, and third-party apps.
Using Keyboard Shortcuts
One of the simplest ways to take a screenshot on a MacBook is by using keyboard shortcuts. Here are the three most common keyboard shortcuts for taking a screenshot:
- Press the “Command + Shift + 3”: This shortcut captures a screenshot of the entire screen.
- Press the “Command + Shift + 4”: This shortcut allows you to select a specific area of the screen to capture. Once you press the shortcut, your cursor will change to a crosshair. Use it to select the area you want to capture.
- Press the “Command + Shift + 4 + Spacebar”: This shortcut captures a screenshot of a specific window. Once you press the shortcut, your cursor will change to a camera icon. Use it to select the window you want to capture.
- Press the “Command + Shift + 6”: To take a screenshot of the MacBook Touchbar.
- Press “Command + Control + Shift + 4”: To take a screenshot of a selected area and copy it to the clipboard.
Once you have taken the screenshot, it will be saved as a PNG file on your desktop.
Using the Screenshot Tool
Here’s a step-by-step guide on how to take a screenshot using the Screenshot tool on a MacBook:
Step 1: Open the Screenshot Tool
- Click on the Spotlight icon in the top right corner of your screen, or press Command + Spacebar.
- Type “Screenshot” in the search bar and hit enter.
- The Screenshot tool will open in the bottom right corner of your screen.
Step 2: Select the Capture Method
- The Screenshot tool provides three options for capturing screenshots: Capture Entire Screen, Capture Selected Window, and Capture Selected Portion.
- Select the option that best fits your needs.
Step 3: Capture the Screenshot
- Once you have selected the capture method, the tool will automatically capture a screenshot.
- If you selected “Capture Selected Portion,” your cursor will change to a crosshair. Use it to select the area you want to capture.
- If you selected “Capture Selected Window,” your cursor will change to a camera icon. Use it to select the window you want to capture.
Step 4: Save the Screenshot
- The Screenshot will be saved automatically to your desktop with the name “Screen Shot [date] at [time].png”
- If you want to change the name or save it to a different location, right-click on the screenshot and select “Rename” or “Move to”.
Step 5: Edit the Screenshot (Optional)
- If you want to make any edits to the screenshot before sharing it, you can use the built-in markup tools.
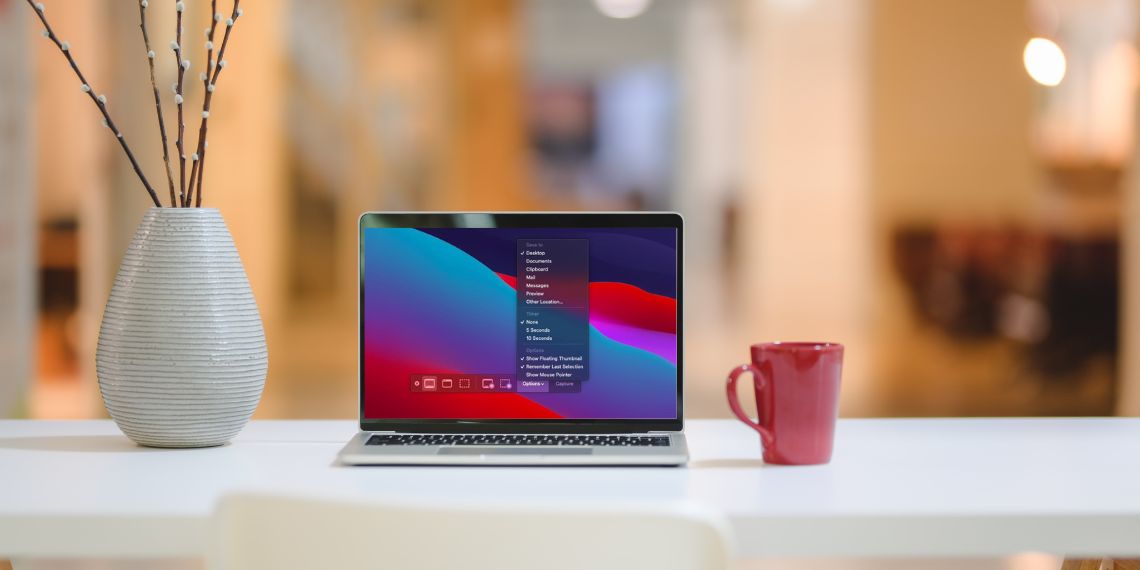
- Click on the screenshot, press “Command + Shift + 5”, and select the “Options” button.
- You can then use the tools available to add text, shapes, and more.
And that’s it! You’ve successfully taken a screenshot on your MacBook using the built-in Screenshot tool. With this tool, you can easily capture screenshots of the entire screen, a specific window, or a selected portion, and even set a timer for the screenshot. You can also use the built-in markup tools to add text, shapes, and more to the screenshot before sharing it.
Using Third-Party Apps
If you’re looking for more advanced features or options, there are several third-party apps available for taking screenshots on a MacBook. Some popular apps include Lightshot, Skitch, and Nimbus Screenshot. These apps offer additional features such as annotation tools, image editing, and cloud storage integration. To use these apps, you will need to download and install them on your MacBook. Once installed, you can use them to take screenshots and access their features.
Additional Tips to Take Screenshots on MacBook
Here are a few additional tips for editing and organizing screenshots on a MacBook:
- Use the built-in markup tools: The Preview app on a MacBook has a variety of built-in markup tools that can be used to add text, shapes, and other annotations to a screenshot. These tools can be accessed by opening the screenshot in the Preview app and clicking on the “Show Markup Toolbar” button.
- Use third-party image editing software: If you need more advanced editing tools than what the Preview app offers, you can use third-party image editing software such as Paintbrush, GIMP, or Adobe Photoshop.
- Organize your screenshots: To keep your screenshots organized, you can create a specific folder on your desktop or in your Documents folder to store all of your screenshots. This will make it easy to find a specific screenshot when you need it.
- Use a screenshot management tool: There are a variety of tools available that can help you organize, annotate and share screenshots. Some popular ones include CloudApp, Lightshot and Nimbus.
- Use the built-in keyboard shortcuts to edit the screenshots on the fly: On MacOS X Yosemite and later, you can press “Command + Shift + 5” to launch the screenshot utility, which allows you to take screenshots, record your screen, and even annotate the screenshots in real-time.
By following these tips, you can easily take, edit and organize screenshots on a MacBook and make the most out of this useful tool.
Conclusion
In this article, we covered the process of taking a screenshot on a MacBook and an older MacBook Pro. We reminded that the basic keyboard shortcuts for taking a screenshot are Command + Shift + 3 for full screen and Command + Shift + 4 for selected area or window. These shortcuts remain the same across different macbook models, but the editing tools may vary depending on the model and the macOS version. Following these tips will help you easily take, edit and organize screenshots on a MacBook and make the most out of this useful tool.